Below you will find the list of accounts you will need and a suggested account name followed by a brief explanation of anything special about this account. You will be creating the accounts in AD.
1) Setup Account – SP_Admin – This is the account that you will log into the MOSS server to do the install and when you wish to administer the server. This account will need to be a local administrator on the MOSS server and be given the securityadmin and dbcreator roles from within SQL Server.
2) Farm Account – SP_Farm – This is the account that your farm will connect to the SQL Server as. It should only be a domain user. When you tell MOSS to use this account it will automatically set the account up as a dbcreator, securityadmin, and db_owner for all SharePoint databases.
3) WSS Search Service – SP_WSSSearch – This account is a domain user. SharePoint will automatically assign it read access to the configuration database and the content database for central administration.
4) WSS Search Crawl – SP_WSSCrawl – This account is a domain user. SharePoint will automatically grant this account Full read to the farm.
5) MOSS Search – SP_MossSearch – This account is a domain user. SharePoint will grant access to read the configuration database and read access to all content databases hosted in the farm. This will become you default content access account for crawling.
6) SSP App Pool – SP_SSPAppPool – This account is a domain user. SharePoint automatically gives this account db_owner for the SSP content database, read & write to all content databases associated with its SSP, read access to the configuration database, and read access to the central administration database.
7) SSP Service – SP_SSPService – This account is a domain user. Same permissions as the SSP App Pool
8) MY App Pool – SP_MyAppPool – This account is a domain user. This account will be used as the identity for the My Sites application pool. It will be granted db_owner to that content database, read access to the config and central administration databases, and read access to the associated SSP database.
9) Portal App Pool – SP_PortalAppPool – This account is a domain user. This account will be used as the identity for the portal application pool in the Module 3 lab. It will be granted db_owner to that content database, read access to the config and central administration databases, and read access to the associated SSP database.
Monday, December 22, 2008
Thursday, October 9, 2008
Web Part Maintenance Page
In some cases we need some way to close the offending web parts.In that case we go to the Web Part Maintenance Page.
For the Web Part Maintenance Page is to append "?contents=1" to the end of your web part page's URL and loading that page.
For example:
/sites/foo.aspx
/sites/foo.aspx?contents=1.
For the Web Part Maintenance Page is to append "?contents=1" to the end of your web part page's URL and loading that page.
For example:
/sites/foo.aspx
/sites/foo.aspx?contents=1.
Monday, October 6, 2008
How to add Audience Targeting to a link at QuickLaunchBar?
I strugle a lot for setting a group to a link.So that the group users only can see the link at quicklaunchbar.
I would like to share a few lines...
if (userGroup == "Publisher")
{
node.Properties.Add("Audience", ";;;;" + groupName1);
node.Update();
}
else if (userGroup == "Certifier")
{
node.Properties.Add("Audience", ";;;;" + groupName2);
node.Update();
}
I would like to share a few lines...
if (userGroup == "Publisher")
{
node.Properties.Add("Audience", ";;;;" + groupName1);
node.Update();
}
else if (userGroup == "Certifier")
{
node.Properties.Add("Audience", ";;;;" + groupName2);
node.Update();
}
Sharepoint Interview questions
1-Question: can you create page layout templates in Visual Studio?Answer: Yes, but longer answer in the Page Layout module
2-Question: When using SharePoint designer for Page Layout Templates can you add code behind or reference an ascx file with a dll?Answer: You can... unfortunately it's not wired together as easily as you have when bulding ASPX pages in Visual Studio 2005. So what you do is create a class library and then specify which class the page inherits from in the Inherits attribute within the page's directive.
3-Question: Can we get the code for the "Minimal "publishing site template?Answer: Sure... just change the WSP file extension to CAB and you can easily extract it and see the contents. WSP's are just CAB files renamed as WSP's.
4-Question: I missed the extra step you did in extending the existing web app? did you just change the port?
5-Question: So the customized pages need to be placed under MPG(Master page gallary) & is ASP.Net master page same as MOSS master page?Answer: (1) If they are created using SPD, all masters and page layouts must be in the MPG... they can't be anywhere else. Once you open them and edit them, when you save them, they stay in the MPG as customised. (2) yes, you just have to have the sharepoint placeholder controls in your master page.
6-Question: is it possible to customize TOC for Press Releases by showing first couple of lines per press release?Answer: Yes... you'd just use the same technique you use for the Content Query Web Part by modifing the XSLT files or creating your own custom XSLT.
7-Question: I use createchildcontrols but find that sometimes it does not have values on post back so I have had to use oninitAnswer: At times you do need to add things to OnInit to register event handlers and such, yes that's correct.
8-Question: 1- How do you debug webparts? 2 - Is it performance consuming to have 3 content query webpart on a page (for the welcome page for an internet site)?Answer: (1) you manually attach the debugger to the w3wp.exe process...
9-Question: What are the best scenarios to use 1)Web Parts, User Controls, Application Pages please compare and contrast.Answer: Web Parts are good as "little applications", such as aggregation controls. In SharePoint we typically don't build many user controls, but you can do it. However, there's nothing special about SharePoint in deciding when to build user controls vs. Web Parts... it's the same decision process you'd have in an ASP.NET 2.0 site. As for application pages (which are deployed to the _layouts directory), these are good for pages you want to be avaialble to ALL sites in your farm as all sites share the same _layouts path.
10-Question: If I have an asp/net application (ie. showing mortgage rates), how do I install this in MOSS? Do I use WebParts or is there another technique?
11-Question: How can we better link lists together, we have primary keys in DBMS.. what about SharePoint lists/DocLibs?Answer: there's no relationship between sharepoint lists... but you can enforce this with event receivers.
12-Question: Is it possible to use infopath and aspx pages in the same workflow?Answer: Hmm... If you can use InfoPath forms, then you should beacuse they do so much heavy lifting for you!
13-Question: How can we deal with cases in which the approver did not respond in a timely manner?Answer: There are activities in the base activity library in WF that you can use to wake up your activity after a specified time... within this activity you can check how long it's been pending and either give them a reminder slap via email or you can change the approver and reroute it. But you'd have to this using custom workflows.
Friday, August 29, 2008
Break the permissions inheritance of a site
This code allows you to break the permissions inheritance of a site
string siteGroupNamePublisher = "SampleReadOnly";
string desc = "A group to manage read only user for root site";
siteCol = (SPSite)properties.Feature.Parent;
site = siteCol.RootWeb;
try {
SPSecurity.RunWithElevatedPrivileges(delegate() {
//Start--Creating SampleGroup which has read permissions n Break Inheritense
logFile.WriteInfo(CLASS, "FeatureActivated", "Creating SampleGroup which has read permissions n Break Inheritence", debugInfo);
SPGroup secGroup1;
SPRoleAssignment roleAssignment1;
SPRoleDefinition roleDefinition1;
site.SiteGroups.Add(siteGroupNamePublisher, site.CurrentUser, site.CurrentUser, desc);
secGroup1 = site.SiteGroups[siteGroupNamePublisher];
roleAssignment1 = new SPRoleAssignment(secGroup1);
roleDefinition1 = site.RoleDefinitions["Read"]; roleAssignment1.RoleDefinitionBindings.Add(roleDefinition1); site.RoleAssignments.Add(roleAssignment1);
//End--Creating SampleGroup which has read permissions n Break Inheritense
});
Update() Vs SystemUpdate()
Many of you might noticed that share point ListItem has Update() method as well as SystemUpdate().
What is the difference between these two methods and why MOSS has two different APIs for updating an ListItem ?
ListItem.Update() will....
Creates new version automatically for each and every update
Updates the Modifer field details with SystemAccount
ListItem.SystemUpdate()
Don't create new version for updates
Updates the Modifer field details with the user details who updates the ListItem
Tuesday, July 8, 2008
sharepoint e-books.
Beginners
Beginning.SharePoint.2007.Building.Team.Solutions.with.MOSS.2007.Jun.2007
This book is very good for beginners, One who wants to start of with sharepoint can go ahead and read this book.
Download this book
Lets move on with Professional Development
The book that really of interest and provides a deep into WSS 3.0 is
Microsoft.Press.Inside.Microsoft.Windows.SharePoint.Services.3.0.Apr.2007
To know tits and bits of how wss works from inside, i suggest you to read this bookAfter all, its from Microsoft Press :)
Download this book
Wednesday, July 2, 2008
How to set access permission to a Sharepoint List
My list called "WorkFlowTempDocLib" has Read permission for group called
siteGroupNamePublisher="Publisher";
SPList yourList = site.Lists["WorkFlowTempDocLib"];
SPGroup secGroupCertifier = site.SiteGroups[siteGroupNameCertifier];
yourList.BreakRoleInheritance(true);
SPRoleAssignment roleAssignment3 = new SPRoleAssignment(secGroupCertifier);
SPRoleDefinition roleDefinition3 = site.RoleDefinitions.GetByType(SPRoleType.Contributor);
roleAssignment3.RoleDefinitionBindings.Add(roleDefinition3);
yourList.RoleAssignments.Add(roleAssignment3);
yourList.Update();
Tuesday, July 1, 2008
Adding Links to QuickLaunchBar....

Sample Lists.xml

public override void FeatureActivated(SPFeatureReceiverProperties properties)
{
//Begin--Adding a Link to QuickLaunchBar....
ABCConfig config = new ABCConfig();
SPWeb site = (SPWeb)properties.Feature.Parent;
SPWeb rootsite = site.Site.RootWeb;
SPNavigationNodeCollection navColl = site.Navigation.QuickLaunch;
SPNavigationNode navNode = new SPNavigationNode("Submissions", "");
navColl.AddAsFirst(navNode);
//Read name and urls from the xml file
XmlDocument doc = new XmlDocument();
string ListOperationXMLPath = config.GetConfigValue(rootsite, "ABCLinks");
doc.Load(ListOperationXMLPath);
XmlNodeList lists = doc.GetElementsByTagName("Link");
foreach (XmlNode node1 in lists)
{
XmlElement fieldElement = (XmlElement)node1;
string FieldNameTitle = "";
string xmlUrl = "";
string siteUrl = "";
if (fieldElement.HasAttributes)
{
FieldNameTitle = fieldElement.Attributes["Title"].InnerText;
xmlUrl = fieldElement.Attributes["Url"].InnerText;
siteUrl = "/" + site.Title + "/"+xmlUrl;
SPNavigationNode node = new SPNavigationNode(FieldNameTitle, siteUrl);
foreach (SPNavigationNode nodes in site.Navigation.QuickLaunch)
{
if (nodes.Title.Equals("Submissions", StringComparison.InvariantCultureIgnoreCase))
{
nodes.Children.AddAsLast(node);
break;
}
}
}
}
Tuesday, June 10, 2008
How to Creating a Custom Site Definition in Sharepoint
Site Definition project is a class library project.

All components that you want to be automatically provisioned within sites created from the site definition should be referenced from this ONET.xml file. The base structure of the ONET site definition schema is shown below.

NavBars
If you’d like to simply use the default navigation scheme in your site definition, copy the contents of this node from the STS site definition. If you are building custom navigation controls and want to bypass the SharePoint navigation user interface entirely, you can skip this node. Note that navigation bars included in this node also define the Quick Launch sidebar within the Team Site, which can also be accessed by code through the object model. To add a navigation element to the Quick Launch sidebar, add an additional NavBar element to the NavBars node. Following is an example QuickNav bar that you can add through CAML in the site definition. Note that the HTML within the Prefix, Body, and Suffix attributes is XML encoded. The name of the NavBar specifies the heading of the navigation section, and each NavBarLink node represents a hyperlink. NavBar Name="Site Pages"Prefix="<table border=0 cellpadding=4 cellspacing=0>"Body="<tr><td><table border=0 cellpadding=0 cellspacing=0><tr><td><img src='/_layouts/images/blank.gif' ID='100' alt='' border=0> </td><td valign=top><a ID=onetleftnavbar#LABEL_ID# href='#URL#'>#LABEL#</td></tr></table></td></tr>" Suffix="</table>"ID="1028" >NavBarLink Name="Web Page 1" Url="SitePages/Page01.aspx" />NavBarLink Name="Web Page 2" Url="SitePages/Page02.aspx" />NavBarLink Name="Web Page 4" Url="SitePages/Page04.aspx" />/NavBar>One more example

DocumentTemplates
The DocumentTemplates node documents are used as document library default documentswithin the site. If you do not provide document templates, the site is still created, but the user is not able to create new documents by using the New button in Document Libraries.
Configurations
The site definition can also have multiple configurations, but each configuration reuses the same modules,feature references, and lists. These named configurations must also be referenced in another configuration file, WEBTEMP.*.xml, to be available to Windows SharePoint Services.For example, the following List nodes specify that the Litware Customer Listand Litware Vendor List be created on site creation at the site-relative Lists/Vendors andLists/Customers URLs.

Within the configuration, you can also specify which features should be a part of this site collection or site. The SiteFeatures node lets you define features to be enabled for the site collection if the site is created as the site collection’s top-level site. For site features, you want to include common infrastructure such as the BasicWebParts feature, as well as any additional infrastructure such as a feature that installs your company’s custom .webpart Web Part entries in the Web Part gallery.SiteFeatures>Feature ID="00BFEA71-1C5E-4A24-B310-BA51C3EB7A57" />/SiteFeatures>WebFeatures>Feature ID="00BFEA71-4EA5-48D4-A4AD-7EA5C011ABE5" />/WebFeatures>
Modules
Module element is a defined file set with nested File elements that are used to provision pageinstances from page templates.

Web Template Files
The last component of the site definition is the WEBTEMP file. The WEBTEMP file referencesconfigurations in the site definition’s ONET.xml file. Each site definition solution youcreate should have its own WEBTEMP file, with the following naming convention:WEBTEMP.[solution].xml The WEBTEMP file has one Template node per site definitionand a Configuration node for each configuration.


All components that you want to be automatically provisioned within sites created from the site definition should be referenced from this ONET.xml file. The base structure of the ONET site definition schema is shown below.

NavBars
If you’d like to simply use the default navigation scheme in your site definition, copy the contents of this node from the STS site definition. If you are building custom navigation controls and want to bypass the SharePoint navigation user interface entirely, you can skip this node. Note that navigation bars included in this node also define the Quick Launch sidebar within the Team Site, which can also be accessed by code through the object model. To add a navigation element to the Quick Launch sidebar, add an additional NavBar element to the NavBars node. Following is an example QuickNav bar that you can add through CAML in the site definition. Note that the HTML within the Prefix, Body, and Suffix attributes is XML encoded. The name of the NavBar specifies the heading of the navigation section, and each NavBarLink node represents a hyperlink. NavBar Name="Site Pages"Prefix="<table border=0 cellpadding=4 cellspacing=0>"Body="<tr><td><table border=0 cellpadding=0 cellspacing=0><tr><td><img src='/_layouts/images/blank.gif' ID='100' alt='' border=0> </td><td valign=top><a ID=onetleftnavbar#LABEL_ID# href='#URL#'>#LABEL#</td></tr></table></td></tr>" Suffix="</table>"ID="1028" >NavBarLink Name="Web Page 1" Url="SitePages/Page01.aspx" />NavBarLink Name="Web Page 2" Url="SitePages/Page02.aspx" />

DocumentTemplates
The DocumentTemplates node documents are used as document library default documentswithin the site. If you do not provide document templates, the site is still created, but the user is not able to create new documents by using the New button in Document Libraries.
Configurations
The site definition can also have multiple configurations, but each configuration reuses the same modules,feature references, and lists. These named configurations must also be referenced in another configuration file, WEBTEMP.*.xml, to be available to Windows SharePoint Services.For example, the following List nodes specify that the Litware Customer Listand Litware Vendor List be created on site creation at the site-relative Lists/Vendors andLists/Customers URLs.

Within the configuration, you can also specify which features should be a part of this site collection or site. The SiteFeatures node lets you define features to be enabled for the site collection if the site is created as the site collection’s top-level site. For site features, you want to include common infrastructure such as the BasicWebParts feature, as well as any additional infrastructure such as a feature that installs your company’s custom .webpart Web Part entries in the Web Part gallery.SiteFeatures>Feature ID="00BFEA71-1C5E-4A24-B310-BA51C3EB7A57" />/SiteFeatures>WebFeatures>Feature ID="00BFEA71-4EA5-48D4-A4AD-7EA5C011ABE5" />/WebFeatures>
Modules
Module element is a defined file set with nested File elements that are used to provision pageinstances from page templates.

Web Template Files
The last component of the site definition is the WEBTEMP file. The WEBTEMP file referencesconfigurations in the site definition’s ONET.xml file. Each site definition solution youcreate should have its own WEBTEMP file, with the following naming convention:WEBTEMP.[solution].xml The WEBTEMP file has one Template node per site definitionand a Configuration node for each configuration.

Monday, June 9, 2008
Solutions and Deployment
“Where do SharePoint sites come from?”
In a WSS environment, each and every site is created from a site definition. Therefore, we must first explain what a site definition is and show you how to create and deploy one.
Site Definitions
A site definition is the top-level component in WSS that aggregates smaller, more modular definitions to create a complete site template that can be used to provision sites. For example,a site definition usually includes a custom page template for the site’s home page and can additionally reference external features to add support for other types of site-specific elements such as custom lists, secondary pages, and Web Parts.
In WSS, every site is provisioned from a specific site definition. This is true for all top-level sites as well as child sites nested within a site collection. Once a site is provisioned from a particular site definition, it picks up a dependency on that site definition that remains in effect for the lifetime of the site. A site’s dependency on its underlying site definition can never be removed or changed.
Let’s now move on to a discussion of how site definitions are structured and deployed. Similar
to a WSS feature, a site definition is defined with a set of Collaborative Application Markup Language (CAML)-based files that are deployed within a named directory on the file system of each front-end Web server in the farm. Site definitions are deployed within the 12\TEMPLATE\SiteTemplates directory and are referenced in the 12\TEMPLATE\\XML directory in WEBTEMP.XML files, where the folder is the locale identifier (12\TEMPLATE\1033\XML for US English).
A site definition named STS provides familiar site templates such as Team Site, Blank Site, and Document Workspace. You can always back up a site created from one of these site templates and restore it on another farm because the STS site definition is guaranteed to be pre-installed in any farm running WSS 3.0.
A site definition contains one or more configurations, and these configurations are what appear to users as creatable site templates. Therefore, the STS site definition contains three different configurations: Team Site, Blank Site, and Document Workspace.
Tip When creating a new site by using the STSADM.EXE command-line utility or through custom code, you are often required to reference a site definition and one of its configurations by name. This is done by specifying the name of the site definition followed by the pound sign and the integer identifier of the configuration. For example, you can use STS#0 to reference the site template titled Team Site and STS#1 to reference the site template titled Blank Site. The following example uses one of these site template references when creating a new
top-level site by using the STS command-line utility.
STSADM.EXE -o createsite -url http://litwareinc.com
-ownerlogin LITWAREINC\Administrator
-owneremail administrator@Litwareinc.com
-sitetemplate STS#1
A site definition named MPS contains five different configurations for the various Meeting Workspace site templates.Two site definitions are named Blog and Wiki, and each contains a single configuration for creating blog sites and wiki sites. Finally, a site definition named CENTRALADMIN provides the site template used to create the top-level site used in the WSS Central Administration Web application.
The Global Site Definition
WSS 3.0 introduces the Global site definition, which provides a common repository for site provision instructions required by every site definition. This new approach significantly improves the structuring of site definitions over the way things were previously structured in Microsoft Windows SharePoint Services 2.0, in which common provision instructions had to be included as redundant XML in each site definition. The Global site definition refactors more than 2,600 lines of required common components, such as Base Types and required Galleries, which were previously required in the ONET.XML file of every site definition.
The Global site definition is located at the 12\TEMPLATES\GLOBAL path. It contains the standard default.master page template along with instructions to provision an instance of default.master page into the Master Page gallery of every new site. The Global site definition also contains provisioning logic to create the following four site collection–scoped lists in every new top-level site:
■ Web Parts gallery
■ List Template gallery
■ Site Template gallery
■ User Information Profile list
In a WSS environment, each and every site is created from a site definition. Therefore, we must first explain what a site definition is and show you how to create and deploy one.
Site Definitions
A site definition is the top-level component in WSS that aggregates smaller, more modular definitions to create a complete site template that can be used to provision sites. For example,a site definition usually includes a custom page template for the site’s home page and can additionally reference external features to add support for other types of site-specific elements such as custom lists, secondary pages, and Web Parts.
In WSS, every site is provisioned from a specific site definition. This is true for all top-level sites as well as child sites nested within a site collection. Once a site is provisioned from a particular site definition, it picks up a dependency on that site definition that remains in effect for the lifetime of the site. A site’s dependency on its underlying site definition can never be removed or changed.
Let’s now move on to a discussion of how site definitions are structured and deployed. Similar
to a WSS feature, a site definition is defined with a set of Collaborative Application Markup Language (CAML)-based files that are deployed within a named directory on the file system of each front-end Web server in the farm. Site definitions are deployed within the 12\TEMPLATE\SiteTemplates directory and are referenced in the 12\TEMPLATE\
A site definition named STS provides familiar site templates such as Team Site, Blank Site, and Document Workspace. You can always back up a site created from one of these site templates and restore it on another farm because the STS site definition is guaranteed to be pre-installed in any farm running WSS 3.0.
A site definition contains one or more configurations, and these configurations are what appear to users as creatable site templates. Therefore, the STS site definition contains three different configurations: Team Site, Blank Site, and Document Workspace.
Tip When creating a new site by using the STSADM.EXE command-line utility or through custom code, you are often required to reference a site definition and one of its configurations by name. This is done by specifying the name of the site definition followed by the pound sign and the integer identifier of the configuration. For example, you can use STS#0 to reference the site template titled Team Site and STS#1 to reference the site template titled Blank Site. The following example uses one of these site template references when creating a new
top-level site by using the STS command-line utility.
STSADM.EXE -o createsite -url http://litwareinc.com
-ownerlogin LITWAREINC\Administrator
-owneremail administrator@Litwareinc.com
-sitetemplate STS#1
A site definition named MPS contains five different configurations for the various Meeting Workspace site templates.Two site definitions are named Blog and Wiki, and each contains a single configuration for creating blog sites and wiki sites. Finally, a site definition named CENTRALADMIN provides the site template used to create the top-level site used in the WSS Central Administration Web application.
The Global Site Definition
WSS 3.0 introduces the Global site definition, which provides a common repository for site provision instructions required by every site definition. This new approach significantly improves the structuring of site definitions over the way things were previously structured in Microsoft Windows SharePoint Services 2.0, in which common provision instructions had to be included as redundant XML in each site definition. The Global site definition refactors more than 2,600 lines of required common components, such as Base Types and required Galleries, which were previously required in the ONET.XML file of every site definition.
The Global site definition is located at the 12\TEMPLATES\GLOBAL path. It contains the standard default.master page template along with instructions to provision an instance of default.master page into the Master Page gallery of every new site. The Global site definition also contains provisioning logic to create the following four site collection–scoped lists in every new top-level site:
■ Web Parts gallery
■ List Template gallery
■ Site Template gallery
■ User Information Profile list
Designing Site Pages by Using Controls
Custom controls are more lightweight and must be compiled into an assembly DLL before being deployed to the front-end Web server.
Constructing Pages with Custom Controls
developers often choose to create custom controls by deriving from a richer class named WebControl, which inherits from the Control class.
using System.Web.UI;
using System.Web.UI.WebControls;
using Microsoft.SharePoint;
namespace CustomSitePages {
public class CustomControl1 : WebControl {
protected override void RenderContents(HtmlTextWriter output) {
SPWeb site = SPContext.Current.Web;
output.Write("Current Site: " + site.Title);
output.Write("
");
output.Write("Current Site ID: " + site.ID.ToString());
} } }
You have two choices as to where to deploy an assembly DLL that contains a custom control when you want to use it in a site page. First, you can compile the assembly DLL with a strong name and install it in the Global Assembly Cache. Alternatively, you can deploy the assembly DLL by placing it inside the root directory of the hosting Web application inside a nested directory named bin. Note that when you plan to deploy the assembly DLL with custom controls in the bin directory, you have the option of compiling it with or without a strong name.Once the assembly DLL with the custom control is properly deployed, you can then reference it within a page template by using the ASP.NET Register directive. The following code example
displays a page template that uses the custom control shown previously.
%@ Page MasterPageFile="~masterurl/default.master"
meta:progid="SharePoint.WebPartPage.Document" %>
%@ Register Assembly="CustomSitePages, ... "
Namespace="CustomSitePages" TagPrefix="CustomSitePages" %>
asp:Content ID="main"
ContentPlaceHolderId="PlaceHolderMain"
runat="server">
h3>A custom control example/h3>
CustomSitePages:CustomControl1 ID="cc1" runat="server" />
/asp:Content>
This TagPrefix value is then used to instantiate instances of the control within the page.
CustomSitePages:CustomControl1 ID="cc1" runat="server" />
When you navigate to .aspx, you should see that the page renders the output of the
control so that it is visible to the user. However, this works only while the hosting page remains in a ghosted state. Remember that customized pages allow only for controls that are registered as safe controls. If a user customizes Page02.aspx with the SharePoint Designer, the page begins to execute in safe mode, and the presence of a control that is not registered as a safe control results in the error message.
To fix this problem, you must add a custom SafeControl entry to the hosting Web
application’s web.config file. You can accomplish this by adding a SafeControl entry that looks like the following:
SafeControl
Assembly="CustomSitePages, ..."
Namespace="CustomSitePages"
TypeName="CustomControl1"
/>
Constructing Pages with User Controls
The ASP.NET runtime provides the functionality to parse these .ascx files at run time and compile them into assembly DLLs just as it does for .aspx files.
Let’s examine the source file for a simple user control. The following example of an .ascx file creates a simple user interface with a command button and a label and adds in an event handler to provide the classic “Hello World” functionality.
%@ Control Language="C#" %>
script runat="server">
protected void cmdButton1_Click(object sender, EventArgs e) {
lblStatus.Text = "Hello, World";
}
/script>
asp:Button ID="cmdAddCustomer" runat="server" Text="Add Customer"
OnClick="cmdAddCustomer_Click" />
br/>
asp:label id="lblStatus" runat="server" text="">
User controls are always loaded from the file system of the front-end Web server and
compiled into assembly DLLs. Furthermore, user controls can be copied to the front-end Web server only by someone with farm-level administrative privileges. For these reasons, you can assume that you can always write in-line code in an .ascx file.
In Chapter 2, you were introduced to the virtual _layouts directory and learned that this was the proper place to deploy application pages. WSS provides a similar virtual directory for deploying user controls. Inside the TEMPLATE directory resides a nested directory named CONTROLTEMPLATES.
Fortunately, you don’t have to worry about this if you deploy your custom user controls inside the virtual _controltemplates directory because the standard web.config file for a Web application already contains the following SafeControl entry:
SafeControl
Src="~/_controltemplates/*"
IncludeSubFolders="True"
Safe="True"
AllowRemoteDesigner="True"
/>
Now that you have seen how to create and properly deploy a user control, the final step is constructing a page template that references the .ascx file and creates an instance. However, the process is different with user controls because the Register
directive requires an src attribute that points to the virtual path of the target .ascx file.
%@ Page MasterPageFile="~masterurl/default.master"
meta:progid="SharePoint.WebPartPage.Document" %>
%@ Register TagPrefix="luc" TagName="UserControl1"
src="~/_controltemplates/Litware/UserControl1.ascx" %>
asp:content runat="server" contentplaceholderid="PlaceHolderMain">
luc:usercontrol1 id="id1" runat="server">
/asp:Content>
Designing Web Part Pages
Web Parts go even further to allow individual users to add personalization changes that are seen only by them.WSS provides the underlying mechanisms to track all of this customization and personalization inside the content database along with all of the other site-related data.
All of the data for tracking Web Part instances and their customization and personalization data are kept in separate tables inside the content database.This means that a Web Part page can remain in a ghosted state even though users are continually adding, customizing, and personalizing the Web Parts within its zone.
To create a Web Part page in an ASP.NET 2.0 application, you must create an .aspx page that contains exactly one instance of a control named WebPartManager and one or more WebPartZone controls. The WebPartManager is responsible for managing the lifetime of Web Part instances as well as serializing Web Part–related data so that they can be stored and retrieved from the tables in the ASP.NET services database.
WSS relies on a specialized control named SPWebPartManager that derives from the ASP.NET 2.0 WebPartManager control. The SPWebPartManager control overrides the standard behavior of the WebPartManager control to persist Web Part data inside the WSS content database instead of inside the ASP.NET services database.
Two things must be done when creating a page template for a Web Part page. The first is to inherit from the WebPartPage class that is defined inside the Microsoft.SharePoint.dll assembly. The second is to add one or more WebPartZone controls.To add WebPartZone controls to a page template, you must add a Register directive that imports all of the controls from the Microsoft.SharePoint.dll assembly defined in the Microsoft.SharePoint.WebPartPages namespace as shown in the following page template definition.
%@ Page Language="C#" MasterPageFile="~masterurl/default.master"
Inherits="Microsoft.SharePoint.WebPartPages.WebPartPage,Microsoft.SharePoint,Version=12.0.0.0,Culture=neutral,PublicKeyToken=71e9bce111e9429c"
meta:progid="SharePoint.WebPartPage.Document" %>
%@ Register Tagprefix="WebPartPages"
Namespace="Microsoft.SharePoint.WebPartPages"
Assembly="Microsoft.SharePoint, Version=12.0.0.0, Culture=neutral, PublicKeyToken=71e9bce111e9429c" %>
asp:content id="main" runat="server" contentplaceholderid="PlaceHolderMain">
h3>Custom Web Part Page/h3>
table width="100%">
tr>
td valign="top" style="width:50%">
/td>
td valign="top" style="width:50%">
WebPartPages:WebPartZone ID="Right" runat="server"
FrameType="TitleBarOnly"
Title="Right Web Part Zone" />
/td>
/tr>
/table>
/asp:Content>

There are two common techniques for adding a Web Part instance to a Web Part zone. The first technique involves a declarative approach used inside a feature in which you define an AllUsersWebPart element inside a File element. The following example demonstrates the File element that is used in the CustomSitePages project to provision the Web Part page named WebPartPage02.aspx.
Elements xmlns="http://schemas.microsoft.com/sharepoint/">
Module Path="PageTemplates" Url="SitePages" >
File Url="WebPartPage.aspx" Name="WebPartPage03.aspx" Type="Ghostable" >
AllUsersWebPart WebPartZoneID="Left" WebPartOrder="0">
Assembly>Microsoft.SharePoint, Version=12.0.0.0, Culture=neutral, PublicKeyToken=71e9bce111e9429c
TypeName>Microsoft.SharePoint.WebPartPages.ContentEditorWebPart
Title>Yet Another Web Part is Born/Title>
FrameType>TitleBarOnly
cewp:Content>
This Web Part was added through declarative logic
/cewp:Content>
/WebPart>
]]>
/AllUsersWebPart>
AllUsersWebPart WebPartZoneID="Right" WebPartOrder="0">
Assembly>Microsoft.SharePoint, Version=12.0.0.0, Culture=neutral, PublicKeyToken=71e9bce111e9429c
TypeName>Microsoft.SharePoint.WebPartPages.ImageWebPart
FrameType>None
Title>Watch My Gears Run/Title>
iwp:ImageLink>/_layouts/images/GEARS_AN.GIF
/WebPart>
]]>
/AllUsersWebPart>
/File>
/Module>
/Elements>
The second technique for adding a Web Part instance to a Web Part page involves writing code against the WSS object model. An example of this type of code is supplied in the FeatureActivated event handler for the CustomSitePages project. The code obtains a reference to the SPFile object associated with WebPartPage03.aspx and uses an SPLimitedWebPart-Manager object to add a new Web Part instance to a particular target zone.
public override void FeatureActivated(
SPFeatureReceiverProperties properties) {
// acquire objects for site, page and limited Web Part Manager
SPWeb site = (SPWeb)properties.Feature.Parent;
SPFile page = site.GetFile("SitePages/WebPartPage03.aspx");
SPLimitedWebPartManager mgr;
mgr = page.GetLimitedWebPartManager(PersonalizationScope.Shared);
// add Web Part to Right Zone
ImageWebPart wp1 = new ImageWebPart();
wp1.ChromeType = PartChromeType.None;
wp1.ImageLink = @"/_layouts/images/IPVW.GIF";
mgr.AddWebPart(wp1, "RightZone", 0);
}
Master Pages
The pages that link to a master page are known as content pages. Standard master page is deployed during the standard WSS installation on the file system of the front-end Web server at the following path (there is a line break in the file path to make it more readable).
C:\Program Files\Common Files\Microsoft Shared
\web server extensions\12\TEMPLATE\GLOBAL\default.master
Whenever you create a new site, WSS provides provisioning instructions to create the Master Page gallery and provision an instance of default.master within the site by using a standard site-relative path.
/_catalogs/masterpage/default.master
The default.master page contains the basic layout for a site page including elements such as HTML, HEAD, BODY, and FORM. Within these standard HTML elements, you will find three important types of components:
■ Controls for links, menus, icons, and navigation components
■ Named placeholders
■ Delegate controls
The top link bar is defined by using a WSS-specific control of type AspMenu along with a SiteMapDataSource control that is configured to point to the standard SPNavigationProvider component. The Quick Launch menu is defined in the same way. The major difference between the two is that the SiteMapDataSource for the top link bar is configured with a StartingNodeUrl attribute with a value of sid:1002, whereas the Quick Launch menu is configured with a StartingNodeUrl attribute with a value of sid:1025.
The next question you should be asking is what the significance is between 1002 and 1025. It has to do with the data stored in the content database for tracking navigation nodes. The top node for the top link bar has an ID of 1002, and the top node to the Quick Launch menu has an ID of 1025.
The CustomSitePages feature provides code in the FeatureActivated event handler to add navigation nodes to construct a custom drop-down menu in a fashion that is not possible to replicate through the user interface. Examine the following code and observe how it creates SPNavigationNode objects and adds them to the collection of nodes that define the structure for the top link bar.
public override void FeatureActivated(SPFeatureReceiverProperties properties) {
// get a hold of current site in context of feature activation
SPWeb site = (SPWeb)properties.Feature.Parent;
SPNavigationNodeCollection topNav = site.Navigation.TopNavigationBar;
// create dropdown menu for custom site pages
SPNavigationNode DropDownMenu1;
DropDownMenu1 = new SPNavigationNode("Site Pages", "", false);
topNav[0].Children.AddAsLast(DropDownMenu1);
// add navigation nodes to create menu items
DropDownMenu1.Children.AddAsLast(
new SPNavigationNode( "Site Page 1",
"SitePages/Page01.aspx"));
DropDownMenu1.Children.AddAsLast(
new SPNavigationNode("Site Page 2",
"SitePages/Page02.aspx"));
}
Delegate Controls
Like a placeholder, a delegate control can optionally supply default content that is used until a substitution is performed.
One major difference when compared to placeholders is that the substitution mechanism for replacing the contents of a delegate control is driven through feature activation. Therefore, you can replace what’s defined inside a delegate control in default.master without requiring any changes to default.master or the site pages that link to it. All you need to do is define a Control element within a feature and then activate that feature.
SmallSearchInputBox delegate control by referencing a built-in user control with the standard WSS search area content.
control
Id="SmallSearchInputBox"
Sequence="100"
ControlSrc="~/_controltemplates/searcharea.ascx"
/>
Assume that you want to get rid of the standard search area content and replace it with your own custom content for a particular business solution. That’s what delegate controls were designed for.
If you want to replace a delegate control, such as the WSS search area, with your own customized version, you start by adding a Control element to a feature. The Control element should have an ID value of SmallSearchInputBox. The Control element should also have a Sequence number smaller than any other active Control element pointing to the same ID. The following code demonstrates how the Control element is defined inside the elements.xml file of the CustomBranding feature.
Note that this Control element has a sequence number of 10, which is smaller than the Control element defined in ContentLightup with a Sequence number of 100. Once the CustomBranding feature is activated within a site collection, all of the site pages that link to default.master replace the standard WSS search area with whatever content you have defined inside the custom user control named LitwareSearchArea.ascx. The following code defines a starting point for creating a custom user control that supplies custom search behavior.
%@ Control Language="C#" %>
script runat="server">
protected void cmdRunSearch_Click(object sender, EventArgs e) {
// add customer search here
txtSearchText.Text = "Hello";
}
/script>
table>
tr>
td>
td>
/tr>
/table>
Creating a Custom Master Page Template
Creating a custom master page template involves several steps. First, you must create the master page template itself. Second, you must create a custom feature that provisions an instance of this master page template inside the Master Page gallery for a specific site. Finally, you need to add some code to redirect site pages to use your custom master page instead of using default.master. The Visual Studio project named CustomBranding provides a working sample that demonstrates how all of the pieces fit together.
You can create a custom template by using two different approaches. First, you can make a copy of default.master and then modify it according to taste. A second approach involves starting from scratch so that you can design the exact HTML layout you’re looking for. The custom master page template used in the CustomBranding project is named Litware.master. The Litware.master template is a variation on the default.master template with changes to allow for fly-out menus on both the top link bar and Quick Launch menu. The CustomBranding feature includes a Module element that has been designed to provision an instance of the Litware.master page template into the Master Page gallery of the top-level site.
Module Name="MasterPages" List="116" Url="_catalogs/masterpage">
File Url="Litware.master" Type="GhostableInLibrary" />
/Module>
However, this Module targets the Master Page gallery, which is a special type of document library. Therefore, the Module is defined with a List attribute of 116, which is the list type identifier for the Master Page gallery. The Url attribute for this Module is defined with a value of _catalogs/masterpage,
which is the standard site-relative path to the Master Page gallery.
We have reviewed the steps involved in creating a master page template and provisioning an instance of it in the Master Page gallery of the top-level site. The next step involves redirecting all site pages within a site to link to this provisioned instance of our custom master page template. To understand the technique for accomplishing this, take a closer look at the MasterPageFile attribute defined within a Page directive. Examine the following page template, which is defined to link to a target master page by using a special syntax in the form of ~masterurl/default.master.
%@ Page MasterPageFile="~masterurl/default.master" %>
asp:Content ContentPlaceHolderId="PlaceHolderMain" runat="server">
Custom content goes here
/asp:Content>
You can redirect any site page that uses this token by acquiring an SPWeb reference to the current site and then updating the MasterUrl property.
SPWeb site = SPContext.Current.Web;
string MasterUrlPath = site.ServerRelativeUrl;
if (!MasterUrlPath.EndsWith(@"/"))
MasterUrlPath += @"/";
MasterUrlPath += @"_catalogs/masterpage/Litware.master";
site.MasterUrl = MasterUrlPath;
site.Update();
Once you
activate the CustomBranding feature, you can navigate to the application page named
CustomBrand.aspx by using a custom menu item that is added to the Site Settings menu. This application page provides a command button that allows the user to execute the following code.
protected void cmdApplyCustomBrand_Click(object sender, EventArgs e) {
SPWeb site = SPContext.Current.Site.RootWeb
string MasterUrlPath = site.ServerRelativeUrl;
if (!MasterUrlPath.EndsWith(@"/"))
MasterUrlPath += @"/";
MasterUrlPath += @"_catalogs/masterpage/Litware.master";
ApplyCustomBrand(MasterUrlPath, site);
}
protected void ApplyCustomBrand(string MasterUrlPath, SPWeb site) {
site.MasterUrl = MasterUrlPath;
site.Update();
// use recusion to update all child sites in site collection
foreach (SPWeb child in site.Webs) {
ApplyCustomBrand(MasterUrlPath, child);
}
}
The file that defines the majority of the standard CSS classes used by pages in WSS is named core.css.
SPWeb site = SPContext.Current.Web;
site.ApplyTheme("");
site.AlternateCssUrl = "/_layouts/1033/STYLES/Litware/LitwareBrand.css";
site.Update();
Working with Page Templates
When the CustomSitePages feature is activated, it contains declarative logic in elements.xml to provision site page instances from its page templates. The code in the FeatureActivated event extends the navigation components of a WSS site by adding two new drop-down menus to the top link bar with menu items to navigate to the newly provisioned site page instance.
Let’s start with a simple definition for a page template. Examine the following definition for the page template named Page01.aspx.
%@ Page MasterPageFile="~masterurl/default.master"
meta:progid="SharePoint.WebPartPage.Document" %>
asp:Content runat="server" ContentPlaceHolderID="PlaceHolderMain">
h3>Hello World
A simple page template used to create site pages
/asp:Content>
meta:progid attribute is included to make that page compatible with the SharePoint Designer, and is also available in the SPFile object’s ProgID property. Once site page instances have been provisioned by using this page template, users can open these pages with the SharePoint Designer and customize their content.
Keep in mind that a page template, such as Page01.aspx, serves no purpose until you begin using it to provision site page instances. This can be done by creating a feature that contains a special type of element known as a Module.
When you create a Module, you add one or more inner File elements. The key point is that each File element is used to provision an instance of a file from a file template. Remember that the file template exists on the file system of the front-end Web server.
elements xmlns="http://schemas.microsoft.com/sharepoint/">
/u>
file url="Page01.aspx" type="Ghostable">
/module>
/elements>
Note that the File element within this example is created with a Url attribute that points to the source file for the page template. When you activate a feature that contains this Module element, WSS provisions a site page instance within the target site at the following relative path.SitePages/Page01.aspx
Note that the File element in the previous example contains a Type attribute with a value of Ghostable. When a site page instance, such as Page01.aspx, is provisioned, it initially exists in an uncustomized state and benefits from the principles of page ghosting. This means that you can activate this feature in a thousand different sites within a Web application and that all sites use a single compiled version of the page. Page ghosting also makes it possible to make changes to the page template on the file system of the front-end Web server and have those changes affect all of the sites that have pages provisioned from this page template.
Only two possible settings exist for the Type attribute: Ghostable and GhostableInLibrary.These two settings are used to differentiate between files that are provisioned inside a document library and those that are not. In this case, the site page instance has a Type of Ghostable because it is not being provisioned inside a document library. Later in the chapter, you will encounter an example of a File element whose Type attribute value will be defined as GhostableInLibrary.
Safe Mode Processing
It’s important to understand that all customized site pages are parsed and processed in a
special mode known as safe mode. The primary motivation for safe mode involves the
fact that standard users can modify the contents of site pages. In other words, a user (such
as a site owner) possessing no administrator privileges within the farm can make any
modifications to a page within a site. Consider a scenario in a large farm in which a site
administrator attempts to mount an attack on the Web server by writing C# code within a
customized site page inside an in-line script block. Safe mode prevents this type of attack by
disallowing in-line script in any customized source.
Examine the code in the page template named Page02.aspx. It contains a simple in-line script
to write a message back to the browser.
%@ Page Language="C#" MasterPageFile="~masterurl/default.master"
meta:progid="SharePoint.WebPartPage.Document" %>
asp:Content ID="main" runat="server"
ContentPlaceHolderID="PlaceHolderMain">
h3>Page 2
% Response.Write("Hello world from server-side script!"); %>
/asp:Content>
Note that this page and the in-line script run just fine as long as the page remains uncustomized in a ghosted state. Remember that WSS compiles a ghosted page into an assembly DLL for processing. However, as soon as a user modifies any aspect of this page with the SharePoint Designer and moves the site page into an unghosted state, WSS then begins to use safe mode to process it. Because the page contains in-line script, WSS refuses to process it in safe mode and generates the error message. For this reason, you should avoid adding in-line script to page templates.
For example, assume that you want to allow in-line scripts for site pages inside the SitePages folder in a site at the path of /sites/Sales. You can accomplish this by adding the following PageParserPath element
within the SharePoint section of the web.config file.
SharePoint>
SafeMode ... >
PageParserPaths>
PageParserPath
VirtualPath="/sites/Sales/SitePages/*"
IncludeSubFolders="true"
CompilationMode="Always"
AllowServerSideScript="true" />
/PageParserPaths>
/SafeMode>
/SharePoint>
If you examine the PageParserPath element, you see that the VirtualPath attribute has a Web application relative path followed by an asterisk, which includes every site page in that particular folder. Also note that the CompilationMode attribute has a value of Always and the AllowServerSideScript attribute has a value of true. This instructs the safe mode parser to compile all site pages into assembly DLLs and allow in-line script.
At the very least, you should prefer a Compilation-Mode setting of Auto instead of Always so that only pages that actually contain script are compiled into assembly DLLs, whereas those pages that do not contain script continue to be parsed and processed in no-compile mode.
Safe Controls
Tells what controls a user might place on a customized page. Safe mode allows the farm administrator to determine which controls can be used in pages that are processed in safe mode.
Customized pages can only contain server-side controls that are explicitly registered as safe controls. Registering a control as a safe control is accomplished by adding a SafeControl entry into the web.config file for the hosting Web application.
SafeControls>
SafeControl
Assembly="Microsoft.SharePoint, …"
Namespace="Microsoft.SharePoint.WebControls"
TypeName="*"
AllowRemoteDesigner="True" />
/SafeControls>
Pages and Design
Application pages have an advantage over site pages in that they perform better and provide a developer with the ability to add in-line code. You also learned that site pages have some key advantages over application pages because they can be created dynamically and can also be customized by users on a site-by-site basis.
Page ghosting is an optimization used with site pages in which a single page template can be used to process multiple page instances across many different sites. For example, the home page for every team site in a Microsoft Windows SharePoint Services (WSS) farm is based on an underlying page template named default.aspx that resides on the file system of the front-end Web server. A page template, such as default.aspx, is compiled into an assembly dynamic-link library (DLL) and loaded into memory just once per Web application. However, this page template and its efficient usage of memory can still be used to serve up pages for thousands of sites. This is an obvious advantage toward scalability.
When a user customizes a site page by using the SharePoint Designer and then saves those changes, a customized version of the page definition is stored in the content database. While this provides flexibility from a customization standpoint, it also can have a negative impact on performance and scalability. When the customized page is requested, its page definition must be retrieved from the Backend database server by the SPVirtualPathProvider component and then fed to the ASP.NET compiler, where it is parsed and loaded into memory. You can imagine that a Web application with thousands of customized pages requires more memory
because each customized page definition must be separately parsed and loaded into memory within the application pool that is hosting the current Web application. You should note that customized pages are not processed by using the standard ASP.NET model in which a page is compiled into an assembly DLL. Instead, customized pages are parsed by the ASP.NET page parser(parsing means reading once again…) and then processed using the no-compile mode feature that was introduced with ASP.NET 2.0.
No-compile pages can be loaded into memory and then unloaded in a manner that is not
possible for compiled pages because the .NET Framework doesn’t really support the concept of unloading an assembly DLL from memory. The closest equivalent would be to recycle the current Windows process or the current .NET AppDomain. However, this type of recycling involves unloading all assembly DLLs from memory, not just those assembly DLLs that haven’t been used recently. Furthermore, the .NET Framework places an upper limit on the number of assembly DLLs that can be loaded into a .NET AppDomain.
No-compile pages provide higher levels of scalability because they do not require loading new assembly DLLs or managed classes into memory. Instead, the processing of no-compile pages involves loading control trees into memory. WSS can manage the memory usage for the control trees associated with customized pages more efficiently because they are not compiled into assembly DLLs. For example, once WSS has finished processing a customized page, it can unload the page’s control tree to free up memory for other purposes. Furthermore, nocompile pages eliminate the need to go through the compilation process, which actually provides faster response times for pages upon first access.
In ASP.NET2.0 dynamic compilation means –asp.net parser take .aspx &.cs file then parse and compiled it.There is no dll files.
Programming with SPFile Objects
WSS tracks each site page as a file within the content database. You can access a site page through the WSS object model by using the SPFile object. For example, assume that you want to program against the home page for a site. You can obtain a reference to the required SPFile object by using the GetFile method of a SPWeb object.
SPWeb site = SPContext.Current.Web;
SPFile homePage = site.GetFile("default.aspx");
The SPFile class makes it possible to read and write to the contents of a site page. For example,the OpenBinary method of an SPFile object returns a binary array containing the page contents. The OpenBinaryStream method returns a System.IO.Stream object. Each of these methods provides an approach for reading the contents of a site page. An SPFile object also provides a SaveBinary method that allows you to update the contents of a site page as well.Note that updating the contents of a site page by using this method customizes the page and moves it into an customized or unghosted state.
Tip Ghosted and uncustomized are terms used to describe site pages served up using file system templates. Unghosted and customized both refer to pages that exist entirely in the database, which no longer depend on a file system template.
// write out new page in memory stream
MemoryStream stream = new MemoryStream();
StreamWriter writer = new StreamWriter(stream);
writer.WriteLine("");
writer.WriteLine("Hello, World");
writer.WriteLine("");
writer.Flush();
// add new page to site
SPWeb site = SPContext.Current.Web;
site.Files.Add("hello.htm", stream);
The SPFile class provides a CustomizedPageStatus property that makes it possible to determine whether a site page has been customized and placed in an unghosted state. The SPFile object also provides a method named RevertContentStream that removes any customizations and returns an unghosted page to its initial ghosted state.
SPFolder Objects
Each SPFolder object contains a Files property that allows you to enumerate through its files. If you want to enumerate through all of the files at the root folder of a site, you can access the RootFolder property of a SPWeb object and then use a foreach loop to enumerate through all of its files.
SPWeb site = SPContext.Current.Web;
SPFolder rootFolder = site.RootFolder;
foreach (SPFile file in rootFolder.Files){
// process each file
}
The following code displays an example of custom
code that starts at the root folder of a site and uses recursion to populate an ASP.NET
TreeView control.
const string SITE_IMG = @"\_layouts\images\FPWEB16.GIF";
const string FOLDER_IMG = @"\_layouts\images\FOLDER16.GIF";
const string GHOSTED_FILE_IMG = @"\_layouts\images\NEWDOC.GIF";
const string UNGHOSTED_FILE_IMG = @"\_layouts\images\RAT16.GIF";
protected override void OnLoad(EventArgs e) {
SPWeb site = SPContext.Current.Web;
SPFolder rootFolder = site.RootFolder;
TreeNode rootNode = new TreeNode(site.Url, site.Url, SITE_IMG);
LoadFolderNodes(rootFolder, rootNode);
treeSiteFiles.Nodes.Add(rootNode);
treeSiteFiles.ExpandDepth = 1;
}
protected void LoadFolderNodes(SPFolder folder, TreeNode folderNode) {
foreach (SPFolder childFolder in folder.SubFolders) {
TreeNode childFolderNode = new TreeNode(childFolder.Name,
childFolder.Name,
FOLDER_IMG);
LoadFolderNodes(childFolder, childFolderNode);
folderNode.ChildNodes.Add(childFolderNode);
}
foreach (SPFile file in folder.Files) {
TreeNode fileNode;
if (file.CustomizedPageStatus == SPCustomizedPageStatus.Uncustomized) {
fileNode = new TreeNode(file.Name, file.Name, GHOSTED_FILE_IMG);
}
else {
fileNode = new TreeNode(file.Name, file.Name, UNGHOSTED_FILE_IMG);
}
folderNode.ChildNodes.Add(fileNode);
}
}
Site Pages versus Application Pages
Pages that support user customization are known as site pages. Every one of these site pages would become unghosted. This would negatively impact scalability by forcing the front-end Web server to retrieve each page separately from the content database. Each page would also have to be individually parsed and loaded into memory.
There is only one version of an application page scoped at the farm level, it can be
compiled into a single DLL and loaded into memory once for each Web application. You
never have to worry about the existence of different versions of an application page for different sites. Furthermore, application pages are not subject to attack from users who have permissions to customize site pages. Therefore, WSS does not prohibit them from containing in-line code.
There is only one version of an application page scoped at the farm level, it can be
compiled into a single DLL and loaded into memory once for each Web application.
Let us now summarize the difference between site pages and application pages. Site pages support page customization. Examples of site pages include the home page (default.aspx) for a site as well as the pages associated with lists and document libraries, such as AllItems.aspx, NewForm.aspx, and EditForm.aspx. The fact that site pages support customization provides flexibility but can also impact performance and scalability.Application pages do not support customization, which gives them two distinct advantages over site pages. First, each application page is always compiled into a single DLL so that it performs and scales better than a site page. Second, application pages are allowed to have in-line code.
Creating Custom Application Pages
As a rule, application pages should derive from a base class in the Microsoft.SharePoint assembly named LayoutsPageBase.

ApplicationPage1.aspx
%@ Assembly Name="Microsoft.SharePoint, Version=12.0.0.0, Culture=neutral, PublicKeyToken=71e9bce111e9429c" % >
%@ Assembly Name="CustomApplicationPages, Version=1.0.0.0, Culture=neutral, PublicKeyToken=d4e5777b16a5749f" % >
%@ Page Language="C#" MasterPageFile="~/_layouts/application.master"
Inherits="CustomApplicationPages.ApplicationPage1"
EnableViewState="false" EnableViewStateMac="false" %>
asp:content id="Main" contentplaceholderid="PlaceHolderMain" runat="server">
table border="1" cellpadding="4" cellspacing="0" style="font-size:12">
tr>
td>Site Title:
td>
/tr>
tr>
td>Site ID:
td>
/tr>
/table>
/asp:Content>
asp:Content ID="PageTitle" runat="server"
contentplaceholderid="PlaceHolderPageTitle" >
Hello World
/asp:Content>
asp:Content ID="PageTitleInTitleArea" runat="server"
contentplaceholderid="PlaceHolderPageTitleInTitleArea" >
Application Page 1: 'Hello World' with code behind
/asp:Content>
ApplicationPage1.cs
using System;
using System.Web;
using System.Web.UI;
using System.Web.UI.WebControls;
using Microsoft.SharePoint;
using Microsoft.SharePoint.WebControls;
namespace CustomApplicationPages {
public class ApplicationPage1 : LayoutsPageBase {
// add control fields to match controls tags on .aspx page
protected Label lblSiteTitle;
protected Label lblSiteID;
protected override void OnLoad(EventArgs e) {
// get current site and web
SPSite siteCollection = this.Site;
SPWeb site = this.Web;
// program against controls on .aspx page
lblSiteTitle.Text = site.Title;
lblSiteID.Text = site.ID.ToString().ToUpper();
}
}
}
Creating an Application Page with the SPGridView Control
You can see that the class named ApplicationPage2 works together with a custom helper class named PropertyCollectionBinder to create an ADO.NET DataTable object filled with information about the current site and site collection. The DataTable object is being used in this example because its contents can be used to populate SPGridView by using standard ASP.NET data binding techniques.
protected override void OnLoad(EventArgs e)
{
SPSite siteCollection = this.Site;
SPWeb site = this.Web;
// PropertyCollectionBinder pcb = new PropertyCollectionBinder();
PropertyCollectionBinder pcb = new PropertyCollectionBinder();
pcb.AddProperty("Site Title", site.Title);
pcb.AddProperty("Site ID", site.ID.ToString().ToUpper());
pcb.AddProperty("Site Master Page Url", site.MasterUrl);
pcb.AddProperty("Site URL", site.Url);
pcb.AddProperty("Site Collection URL", siteCollection.Url);
pcb.AddProperty("Site Collection ID", siteCollection.ID.ToString().ToUpper());
pcb.AddProperty("Current User Name", site.CurrentUser.Name);
pcb.AddProperty("Is User Site Collection Admin", site.UserIsSiteAdmin.ToString());
pcb.AddProperty("Is User Site Admin", site.UserIsWebAdmin.ToString());
pcb.AddProperty("Site User Count", site.SiteUsers.Count.ToString());
pcb.AddProperty("Host Name", siteCollection.HostName);
pcb.AddProperty("Zone", siteCollection.Zone.ToString());
pcb.AddProperty("Site Collection System Account", siteCollection.SystemAccount.Name);
pcb.BindGrid(grdPropertyValues);
}
%@ Assembly Name="Microsoft.SharePoint, Version=12.0.0.0, Culture=neutral, PublicKeyToken=71e9bce111e9429c" %>
%@ Assembly Name="CustomApplicationPages, Version=1.0.0.0, Culture=neutral, PublicKeyToken=d4e5777b16a5749f" %>
%@ Page Language="C#" MasterPageFile="~/_layouts/application.master"
Inherits="CustomApplicationPages.ApplicationPage2"
EnableViewState="false" EnableViewStateMac="false" %>
%@ Register Tagprefix="SharePoint"
Namespace="Microsoft.SharePoint.WebControls"
Assembly="Microsoft.SharePoint, Version=12.0.0.0, Culture=neutral, PublicKeyToken=71e9bce111e9429c" %>
asp:content id="Main" contentplaceholderid="PlaceHolderMain" runat="server">
SharePoint:SPGridView runat="server"
ID="grdPropertyValues"
AutoGenerateColumns="false"
RowStyle-BackColor="#DDDDDD"
AlternatingRowStyle-BackColor="#EEEEEE" />
/asp:Content>
PropertyCollectionBinder.cs
{
protected DataTable PropertyCollection = new DataTable();
public PropertyCollectionBinder() {
PropertyCollection.Columns.Add("PropertyName", typeof(string));
PropertyCollection.Columns.Add("PropertyValue", typeof(string));
}
public void AddProperty(string PropertyName, string PropertyValue) {
DataRow newRow = PropertyCollection.Rows.Add();
newRow["PropertyName"] = PropertyName;
newRow["PropertyValue"] = PropertyValue;
}
public void BindGrid(SPGridView grid) {
SPBoundField fldPropertyName = new SPBoundField();
fldPropertyName.HeaderText = "Property Name";
fldPropertyName.DataField = "PropertyName";
grid.Columns.Add(fldPropertyName);
SPBoundField fldPropertyValue = new SPBoundField();
fldPropertyValue.HeaderText = "Value";
fldPropertyValue.DataField = "PropertyValue";
grid.Columns.Add(fldPropertyValue);
grid.Width = new Unit(400);
grid.AutoGenerateColumns = false;
grid.DataSource = PropertyCollection.DefaultView;
grid.DataBind();
}
}
Restricting Application Pages to Site Administrators
Application pages are often designed to provide information and functionality
that should only be accessible to site administrators.
Let’s start by revisiting the creation of a CustomAction element within a feature. You can add an attribute named RequireSiteAdministrator and assign it a value of true so that the menu item only displays to those users who are also site administrators.
RequireSiteAdministrator="True"
While this provides a good start by hiding the menu item from users who are not site
administrators, it doesn’t provide a truly secure solution. The application page itself will still be accessible to any user who knows the URL. When you want to lock down an application page in a secure manner, you can accomplish this by overriding the RequireSiteAdministrator property of the LayoutsPageBase base class as shown in the following code.
public class ApplicationPage3 : LayoutsPageBase {
protected override bool RequireSiteAdministrator {
get { return true; }
}
protected override void OnLoad(EventArgs e) {
// your code goes here
} }
{
// get current site and web
SPSite siteCollection = this.Site;
SPWeb site = this.Web;
lblSiteTitle.Text = site.Title;
lblSiteUrl.Text = site.Url.ToLower();
lblSiteCollectionUrl.Text = siteCollection.Url.ToLower();
lstLists.Items.Clear();
foreach (SPList list in site.Lists) {
lstLists.Items.Add(list.Title);
}
lstLists.Rows = lstLists.Items.Count;
lstSiteUsers.Items.Clear();
foreach (SPUser user in site.SiteUsers) {
lstSiteUsers.Items.Add(user.Name);
}
lstSiteUsers.Rows = lstSiteUsers.Items.Count;
}
Adding a Custom Menu Item to the ECB (EditControlBlock)Menu
CustomAction Id="CustomApplicationPage4"
RegistrationType="List"
RegistrationId="101"
ImageUrl="/_layouts/images/GORTL.GIF"
Location="EditControlBlock"
Sequence="240"
Title="Application Page 4" >
urlaction url="~site/_layouts/CustomApplicationPages/ApplicationPage4.aspx?ItemId={ItemId}&ListId={ListId}">
/customaction>
Note that 101 is a list type identifier that applies to all document libraries. WSS dynamically replaces the {ListId} token with the identifying GUID for the current list or document library.
WSS dynamically replaces the {ItemId} token with the integer identifier for the current list item or document.
You can assume that you are dealing with a document library and not simply a standard list type. In these situations, you can add code that converts the SPList object into a SPDocumentLibrary object. You can also access the document in question directly by creating an SPFile object as shown in the following sample.
{
// get current site and web
SPSite siteCollection = this.Site;
SPWeb site = this.Web;
lblSiteTitle.Text = site.Title;
lblSiteUrl.Text = site.Url.ToLower();
string ListId = Request.QueryString["ListId"];
lblListID.Text = ListId;
SPList list = site.Lists[new Guid(ListId)];
lblListTile.Text = list.Title;
lblRootFolderUrl.Text = list.RootFolder.Url;
string ItemId = Request.QueryString["ItemId"];
lblDocumentID.Text = ItemId;
SPListItem item = list.Items.GetItemById(Convert.ToInt32(ItemId));
lblDocumentName.Text = item.Name;
lblDocumentUrl.Text = item.Url;
if (list is SPDocumentLibrary) {
SPDocumentLibrary documentLibrary = (SPDocumentLibrary)list;
lblDocumentTemplateUrl.Text = documentLibrary.DocumentTemplateUrl;
SPFile file = site.GetFile(item.Url);
lblFileAuthor.Text = file.Author.Name;
lblFileSize.Text = file.TotalLength.ToString("0,###") + " bits";
lblFileLastModified.Text = "By " + file.ModifiedBy.Name +
" on " + file.TimeLastModified.ToLocalTime().ToString();
lblFileCheckOutStatus.Text = file.CheckOutStatus.ToString();
}
}
Imp Points
1-If in IIS website has 10 ASP.NET app u have to create explicitly 10 virtual directories.But in WebApp u no need to go Mgr to create Virtual Dir.It is a single process for creaing n no of SiteCollections.
2-For each Asp.net APP u have to maintain 1 web.config.But in MOSS only one web.config for a WEB APP.In this u can maintain n no of site collections.
There is only one version of an application page scoped at the farm level, it can be
compiled into a single DLL and loaded into memory once for each Web application. You
never have to worry about the existence of different versions of an application page for different sites. Furthermore, application pages are not subject to attack from users who have permissions to customize site pages. Therefore, WSS does not prohibit them from containing in-line code.
There is only one version of an application page scoped at the farm level, it can be
compiled into a single DLL and loaded into memory once for each Web application.
Let us now summarize the difference between site pages and application pages. Site pages support page customization. Examples of site pages include the home page (default.aspx) for a site as well as the pages associated with lists and document libraries, such as AllItems.aspx, NewForm.aspx, and EditForm.aspx. The fact that site pages support customization provides flexibility but can also impact performance and scalability.Application pages do not support customization, which gives them two distinct advantages over site pages. First, each application page is always compiled into a single DLL so that it performs and scales better than a site page. Second, application pages are allowed to have in-line code.
Creating Custom Application Pages
As a rule, application pages should derive from a base class in the Microsoft.SharePoint assembly named LayoutsPageBase.

ApplicationPage1.aspx
%@ Assembly Name="Microsoft.SharePoint, Version=12.0.0.0, Culture=neutral, PublicKeyToken=71e9bce111e9429c" % >
%@ Assembly Name="CustomApplicationPages, Version=1.0.0.0, Culture=neutral, PublicKeyToken=d4e5777b16a5749f" % >
%@ Page Language="C#" MasterPageFile="~/_layouts/application.master"
Inherits="CustomApplicationPages.ApplicationPage1"
EnableViewState="false" EnableViewStateMac="false" %>
asp:content id="Main" contentplaceholderid="PlaceHolderMain" runat="server">
table border="1" cellpadding="4" cellspacing="0" style="font-size:12">
tr>
td>Site Title:
td>
/tr>
tr>
td>Site ID:
td>
/tr>
/table>
/asp:Content>
asp:Content ID="PageTitle" runat="server"
contentplaceholderid="PlaceHolderPageTitle" >
Hello World
/asp:Content>
asp:Content ID="PageTitleInTitleArea" runat="server"
contentplaceholderid="PlaceHolderPageTitleInTitleArea" >
Application Page 1: 'Hello World' with code behind
/asp:Content>
ApplicationPage1.cs
using System;
using System.Web;
using System.Web.UI;
using System.Web.UI.WebControls;
using Microsoft.SharePoint;
using Microsoft.SharePoint.WebControls;
namespace CustomApplicationPages {
public class ApplicationPage1 : LayoutsPageBase {
// add control fields to match controls tags on .aspx page
protected Label lblSiteTitle;
protected Label lblSiteID;
protected override void OnLoad(EventArgs e) {
// get current site and web
SPSite siteCollection = this.Site;
SPWeb site = this.Web;
// program against controls on .aspx page
lblSiteTitle.Text = site.Title;
lblSiteID.Text = site.ID.ToString().ToUpper();
}
}
}
Creating an Application Page with the SPGridView Control
You can see that the class named ApplicationPage2 works together with a custom helper class named PropertyCollectionBinder to create an ADO.NET DataTable object filled with information about the current site and site collection. The DataTable object is being used in this example because its contents can be used to populate SPGridView by using standard ASP.NET data binding techniques.
protected override void OnLoad(EventArgs e)
{
SPSite siteCollection = this.Site;
SPWeb site = this.Web;
// PropertyCollectionBinder pcb = new PropertyCollectionBinder();
PropertyCollectionBinder pcb = new PropertyCollectionBinder();
pcb.AddProperty("Site Title", site.Title);
pcb.AddProperty("Site ID", site.ID.ToString().ToUpper());
pcb.AddProperty("Site Master Page Url", site.MasterUrl);
pcb.AddProperty("Site URL", site.Url);
pcb.AddProperty("Site Collection URL", siteCollection.Url);
pcb.AddProperty("Site Collection ID", siteCollection.ID.ToString().ToUpper());
pcb.AddProperty("Current User Name", site.CurrentUser.Name);
pcb.AddProperty("Is User Site Collection Admin", site.UserIsSiteAdmin.ToString());
pcb.AddProperty("Is User Site Admin", site.UserIsWebAdmin.ToString());
pcb.AddProperty("Site User Count", site.SiteUsers.Count.ToString());
pcb.AddProperty("Host Name", siteCollection.HostName);
pcb.AddProperty("Zone", siteCollection.Zone.ToString());
pcb.AddProperty("Site Collection System Account", siteCollection.SystemAccount.Name);
pcb.BindGrid(grdPropertyValues);
}
%@ Assembly Name="Microsoft.SharePoint, Version=12.0.0.0, Culture=neutral, PublicKeyToken=71e9bce111e9429c" %>
%@ Assembly Name="CustomApplicationPages, Version=1.0.0.0, Culture=neutral, PublicKeyToken=d4e5777b16a5749f" %>
%@ Page Language="C#" MasterPageFile="~/_layouts/application.master"
Inherits="CustomApplicationPages.ApplicationPage2"
EnableViewState="false" EnableViewStateMac="false" %>
%@ Register Tagprefix="SharePoint"
Namespace="Microsoft.SharePoint.WebControls"
Assembly="Microsoft.SharePoint, Version=12.0.0.0, Culture=neutral, PublicKeyToken=71e9bce111e9429c" %>
asp:content id="Main" contentplaceholderid="PlaceHolderMain" runat="server">
SharePoint:SPGridView runat="server"
ID="grdPropertyValues"
AutoGenerateColumns="false"
RowStyle-BackColor="#DDDDDD"
AlternatingRowStyle-BackColor="#EEEEEE" />
/asp:Content>
PropertyCollectionBinder.cs
{
protected DataTable PropertyCollection = new DataTable();
public PropertyCollectionBinder() {
PropertyCollection.Columns.Add("PropertyName", typeof(string));
PropertyCollection.Columns.Add("PropertyValue", typeof(string));
}
public void AddProperty(string PropertyName, string PropertyValue) {
DataRow newRow = PropertyCollection.Rows.Add();
newRow["PropertyName"] = PropertyName;
newRow["PropertyValue"] = PropertyValue;
}
public void BindGrid(SPGridView grid) {
SPBoundField fldPropertyName = new SPBoundField();
fldPropertyName.HeaderText = "Property Name";
fldPropertyName.DataField = "PropertyName";
grid.Columns.Add(fldPropertyName);
SPBoundField fldPropertyValue = new SPBoundField();
fldPropertyValue.HeaderText = "Value";
fldPropertyValue.DataField = "PropertyValue";
grid.Columns.Add(fldPropertyValue);
grid.Width = new Unit(400);
grid.AutoGenerateColumns = false;
grid.DataSource = PropertyCollection.DefaultView;
grid.DataBind();
}
}
Restricting Application Pages to Site Administrators
Application pages are often designed to provide information and functionality
that should only be accessible to site administrators.
Let’s start by revisiting the creation of a CustomAction element within a feature. You can add an attribute named RequireSiteAdministrator and assign it a value of true so that the menu item only displays to those users who are also site administrators.
RequireSiteAdministrator="True"
While this provides a good start by hiding the menu item from users who are not site
administrators, it doesn’t provide a truly secure solution. The application page itself will still be accessible to any user who knows the URL. When you want to lock down an application page in a secure manner, you can accomplish this by overriding the RequireSiteAdministrator property of the LayoutsPageBase base class as shown in the following code.
public class ApplicationPage3 : LayoutsPageBase {
protected override bool RequireSiteAdministrator {
get { return true; }
}
protected override void OnLoad(EventArgs e) {
// your code goes here
} }
{
// get current site and web
SPSite siteCollection = this.Site;
SPWeb site = this.Web;
lblSiteTitle.Text = site.Title;
lblSiteUrl.Text = site.Url.ToLower();
lblSiteCollectionUrl.Text = siteCollection.Url.ToLower();
lstLists.Items.Clear();
foreach (SPList list in site.Lists) {
lstLists.Items.Add(list.Title);
}
lstLists.Rows = lstLists.Items.Count;
lstSiteUsers.Items.Clear();
foreach (SPUser user in site.SiteUsers) {
lstSiteUsers.Items.Add(user.Name);
}
lstSiteUsers.Rows = lstSiteUsers.Items.Count;
}
Adding a Custom Menu Item to the ECB (EditControlBlock)Menu
CustomAction Id="CustomApplicationPage4"
RegistrationType="List"
RegistrationId="101"
ImageUrl="/_layouts/images/GORTL.GIF"
Location="EditControlBlock"
Sequence="240"
Title="Application Page 4" >
urlaction url="~site/_layouts/CustomApplicationPages/ApplicationPage4.aspx?ItemId={ItemId}&ListId={ListId}">
/customaction>
Note that 101 is a list type identifier that applies to all document libraries. WSS dynamically replaces the {ListId} token with the identifying GUID for the current list or document library.
WSS dynamically replaces the {ItemId} token with the integer identifier for the current list item or document.
You can assume that you are dealing with a document library and not simply a standard list type. In these situations, you can add code that converts the SPList object into a SPDocumentLibrary object. You can also access the document in question directly by creating an SPFile object as shown in the following sample.
{
// get current site and web
SPSite siteCollection = this.Site;
SPWeb site = this.Web;
lblSiteTitle.Text = site.Title;
lblSiteUrl.Text = site.Url.ToLower();
string ListId = Request.QueryString["ListId"];
lblListID.Text = ListId;
SPList list = site.Lists[new Guid(ListId)];
lblListTile.Text = list.Title;
lblRootFolderUrl.Text = list.RootFolder.Url;
string ItemId = Request.QueryString["ItemId"];
lblDocumentID.Text = ItemId;
SPListItem item = list.Items.GetItemById(Convert.ToInt32(ItemId));
lblDocumentName.Text = item.Name;
lblDocumentUrl.Text = item.Url;
if (list is SPDocumentLibrary) {
SPDocumentLibrary documentLibrary = (SPDocumentLibrary)list;
lblDocumentTemplateUrl.Text = documentLibrary.DocumentTemplateUrl;
SPFile file = site.GetFile(item.Url);
lblFileAuthor.Text = file.Author.Name;
lblFileSize.Text = file.TotalLength.ToString("0,###") + " bits";
lblFileLastModified.Text = "By " + file.ModifiedBy.Name +
" on " + file.TimeLastModified.ToLocalTime().ToString();
lblFileCheckOutStatus.Text = file.CheckOutStatus.ToString();
}
}
Imp Points
1-If in IIS website has 10 ASP.NET app u have to create explicitly 10 virtual directories.But in WebApp u no need to go Mgr to create Virtual Dir.It is a single process for creaing n no of SiteCollections.
2-For each Asp.net APP u have to maintain 1 web.config.But in MOSS only one web.config for a WEB APP.In this u can maintain n no of site collections.
Sunday, June 8, 2008
SharePoint Architecture
Both ASP.NET and WSS rely on IIS 6.0 to supply the underlying listening mechanism to process incoming HTTP requests and supply a management infrastructure for launching and running worker processes on the Web server.
An IIS Web site provides an entry point into the IIS Web server infrastructure. Each IIS Web site is configured to listen for and process incoming HTTP requests that meet certain criteria.For example, an IIS Web site can be configured to handle requests coming in over a specific IP address or port number or can be routed to the Web server by using a specific host header,such as http://Extranet.Litwareinc.com.
IIS automatically creates and configures an IIS Web site named Default Web Site that listens for HTTP requests coming in over port 80 on any of the IP addresses supported on the local Web server.
Each IIS Web site is configured to map to a root directory, which is a physical directory on the file system of the hosting Web server. For example, standard configuration for IIS maps the Default Web Site to a root directory located at C:\Inetpub\wwwroot. In the most straightforward routing scenarios, IIS maps incoming HTTP requests to physical files inside the root directory.For example, IIS will respond to a request for http://www.Litwareinc.com/page1.htm by simply loading the contents of the file located at c:\Inetpub\wwwroot\page1.htm into memory and streaming it back to the client.
A virtual directory is an entity that defines a child URL space nested within the URL space of its parent IIS Web site. Like an IIS Web site, a virtual directory is configured with a root directory on the file system of the hosting Web server.
Note that IIS tracks configuration information about its IIS Web sites and virtual directories in a repository known as the IIS metabase. The IIS metabase lives on the file system of each front-end Web server running IIS. For example, when you create and configure an IIS Web site using the IIS administration utility, IIS tracks these changes by writing entries to the local IIS metabase.
ISAPI Extensions and ISAPI Filters
In the most straightforward routing scenarios, IIS simply maps an incoming request to a physical file within the root directory of an IIS Web site or virtual directory. However, IIS also supports the Internet Server Application Programming Interface (ISAPI) programming model, which provides the opportunity for more sophisticated routing scenarios. In particular, the ISAPI programming model allows you to configure an IIS Web site or virtual directory so that incoming requests trigger the execution of custom code on the Web server.The ISAPI programming model consists of two primary component types: ISAPI extensions and ISAPI filters.
An ISAPI extension is a component DLL that plays the role of an endpoint for an incoming request. The fundamental concept is that IIS can map incoming requests to a set of endpoints that trigger the execution of code within an ISAPI extension DLL. An ISAPI extension DLL must be installed on the Web server and configured at the level of either an IIS Web site or virtual directory. Configuration commonly involves associating specific file extensions with the ISAPI extensions by using an IIS application map.
While an ISAPI extension serves as an endpoint, an ISAPI filter plays the role of an interceptor(interrupt/stop).An ISAPI filter is installed and configured at the level of the IIS Web site. Once installed, an ISAPI filter intercepts all incoming requests targeting that IIS Web site. The fundamental concept is that an ISAPI filter can provide pre-processing and post-processing for each and every incoming request. ISAPI filters are typically created to provide low-level functionality for an IIS Web site, such as custom authentication and request logging.
Application Pools and the IIS Worker Process
IIS provides a flexible infrastructure for managing worker processes by using application pools. An application pool is a configurable entity that allows you to control how IIS maps IIS Web sites and virtual directories to instances of the IIS worker process. Note that instances of the IIS worker process are launched using an executable named w3wp.exe, as shown in Figure 2-2.

The routing architecture of IIS is controlled by a kernel-level device driver named http.sys.This device driver listens for incoming HTTP requests and uses information in the IIS metabase to route them to whatever instance of w3wp.exe is associated with the target application pool. If http.sys determines that the target application pool doesn’t have a running instance of w3wp.exe, it launches a new instance on demand to process the request.
Every application pool has an important setting known as the application pool identity. The application pool identity is configured with a specific Windows user account that is either a local account on the Web server or a domain account within an Active Directory directory service domain. When http.sys launches a new instance of w3wp.exe for a specific application pool,it uses the application pool identity to initialize a Windows security token that serves as the process token.
ASP.NET 2.0 Framework
The ASP.NET Framework is implemented as an ISAPI extension named aspnet_isapi.dll. The basic configuration for ASP.NET involves registering application maps for common ASP.NET file extensions including .aspx, .ascx, .ashx, and .asmx at the level of an IIS Web site or virtual directory. When IIS sees an incoming request targeting a file with one of these extensions, it forwards the request to aspnet_isapi.dll, which effectively passes control over to the ASP.NET Framework.
Once the ASP.NET page parser builds the source file for an .aspx page, it can then compile it into a DLL. This compilation occurs automatically the first time the .aspx file is requested.Once the ASP.NET runtime has compiled an .aspx file into a DLL, that copy of the DLL can be used for all subsequent requests that target the same .aspx file. However, the ASP.NET runtime monitors the datetime stamp on the .aspx file and retriggers the compilation process to rebuild the DLL if it sees that the associated .aspx file has been updated.A page that links to a master page is known as a content page.
HTTP Request Pipeline
Figure 2-4 displays a picture of the HTTP Request Pipeline and its three replaceable component types: HttpHandler, HttpApplication, and HttpModule. As requests come in, they are queued up and assigned to a worker thread that then processes the request by interacting with each of these component types.

The ultimate destination of any request is the endpoint, which is modeled in the HTTP
Request Pipeline by using an HttpHandler class, which implements the IHttpHandler
interface. As a developer, you can create a custom HttpHandler component and plug it into the HTTP Request Pipeline by adding configuration elements to the web.config file.The HTTP Request Pipeline places an HttpApplication component in front of the HttpHandler.
On an application-wide basis, incoming requests are always routed through the HttpApplication before they reach the target HttpHandler, thus giving the HttpApplication the ability to preprocess any request no matter which HttpHandler it is being routed to. This preprocessing stage is handled through a series of events that are defined inside the HttpApplication class
such as BeginRequest, AuthenticateRequest, and AuthorizeRequest.
However, you can replace this standard component by creating a file named global.asax and placing it in the root directory of the hosting ASP.NET application. For example, you can create a global.asax that looks like the following:
protected void Application_AuthenticateRequest(object sender, EventArgs e) {
// your code goes here for request authentication
}
protected void Application_AuthorizeRequest(object sender, EventArgs e) {
// your code goes here for request authorization
}
The third replaceable component type in the HTTP Request Pipeline is the HttpModule. The HttpModule is similar to the HttpApplication component in that it is designed to handle events defined by the HttpApplication class and is processed before control is passed to any HttpHandler classes. For example, you can create a custom HttpModule component to handle request-level events such as BeginRequest, AuthenticateRequest, and AuthorizeRequest. As with the HttpHandler, an HttpModule class is defined with an interface. You can create a class that implements the IHttpModule interface and plug it into the HTTP Request Pipeline by adding configuration elements to the web.config file.
Whereas custom HttpApplication components can be defined as simple text files with an
.asax extension, custom HttpModule components are always compiled as classes within
assembly DLLs. To add a custom HttpModule component into the HTTP Request Pipeline,
you then add entries into a web.config file.
HttpModule components can be configured at the machine level. In fact, the ASP.NET
Framework ships with several different HttpModule components that are automatically
configured at the machine level to provide ASP.NET functionality for things such as Windows authentication, Forms authentication, and output caching.
The final component that we want to discuss with respect to the HTTP Request Pipeline is HttpContext. As ASP.NET initializes a request to send to the HTTP Request Pipeline, it creates an object from the HttpContext class and initializes it with important contextual information.The Object contains such as Request, User, and Response.
HttpContext currentContext = HttpContext.Current;
string incomingUrl = currentContext.Request.Url;
string currentUser = currentContext.User.Identity.Name;
currentContext.Response.Write("Hello world");
WSS Integration with ASP.NET
WSS integrates with ASP.NET at the level of the IIS Web site. Each IIS Web site in which you intend to host WSS sites must go through a one-time transformation process in which it is configured to become what WSS terminology refers to as a Web application. This transformation process involves adding IIS metabase entries and a WSS-specific web.config file to the root directory of the hosting IIS Web site. Once the transformation is completed, WSS extends the routing architecture of IIS and ASP.NET to properly route all incoming requests through the WSS runtime.
Creating a Web application requires a significant number of changes to the file system and the IIS metabase on each front-end Web server. In a Web farm environment, these changes are automatically mirrored across each front-end Web server in the farm by the WSS runtime.
Once a Web application is created, it is no longer necessary to touch the file system or IIS metabase of the front-end Web server when creating, updating, and deleting sites or site collections. The WSS architecture makes it possible to provision new sites and site collections simply by adding entries to the configuration database and a content database. It is this aspect of the WSS architecture that gives it significant management and provisioning advantages
over ASP.NET.
Web Applications
Two primary ways exist to create a Web application by using either the WSS Central Administration Application or the stsadm.exe command-line utility. First, you can create a Web application by converting an existing IIS Web site. Alternatively, you can create a new Web application from scratch and let WSS create the new IIS Web site for you behind the scenes. In either case, WSS configures the resulting IIS Web site by adding an IIS application map and creating several virtual directories. WSS also copies a global.asax file and web.config file to the root directory of the hosting IIS Web site.
WSS must add an IIS application map to each Web application to ensure that each and every incoming request is initially routed to the ASP.NET runtime. Remember that the default configuration for ASP.NET only registers application maps for requests with well-known ASP.NET file extensions such as .aspx, ascx, .ashx, and .asmx. Therefore, WSS configures the hosting IIS Web site with a wildcard application map to route all incoming requests to aspnet_isapi.dll, including those requests with non-ASP.NET extensions such as .doc, .docx, and .pdf.
Because every request targeting a Web application is routed through aspnet_isapi.dll, the request gets fully initialized with ASP.NET context. Furthermore, its processing behavior can be controlled by using a custom HttpApplication object and adding configuration elements to the web.config file. The WSS team uses standard ASP.NET techniques to extend the HTTP Request Pipeline by using several custom components, as shown in Figure 2-5.
First, you can see that WSS configures each Web application with a custom HttpApplication object by using the SPHttpApplication class. Note that this class is deployed in the WSS system assembly Microsoft.SharePoint.dll. WSS integrates this custom application class by creating a custom global.asax file at the root of the Web application that inherits from SPHttpApplication.

You can see that the standard WSS web.config file configures SPRequestModule so that it is the first HttpModule to respond to application-level events in the HTTP Request Pipeline of ASP.NET. If you examine the web.config file for a WSS Web application, you will see that WSS adds back in several of the standard HttpModule components from the ASP.NET Framework that deal with things such as output caching and various types of authentication.
SPVirtualPathProvider
One of the strengths of WSS over ASP.NET is its ability to provision and customize pages
within a site without having to make any changes to the local file system of the front-end Web
server. This capability of WSS to provision and customize pages is made possible by storing
customized versions of .aspx files and .master files inside the content database and retrieving
them on demand when they are needed to process an incoming page request.
when the same page is requested, WSS must retrieve the contents of this customized page definition from the content database and pass it along to the ASP.NET runtime for parsing. We will now explain the architectural details that make this possible.
ASP.NET 2.0 introduced a new pluggable component type known as a virtual path provider. The idea behind a virtual path provider is that it abstracts the details of where page files are stored away from the ASP.NET runtime. By creating a custom virtual path provider, a developer can write a custom component that retrieves ASP.NET file types, such as .aspx and .master files, from a remote location, such as a Microsoft SQL Server database. Once a virtual path provider retrieves the contents of an .aspx page, it can pass it along to the ASP.NET runtime for parsing.
SPVirtualPathProvider is able to retrieve an ASP.NET page file from the content database, such as default.aspx, and then pass it along to the ASP.NET page parser. The SPVirtualPathProvider class works together with another class named the SPPageParserFilter to supply processing instructions to the ASP.NET page parser. For example, the SPPageParserFilter component controls whether the ASP.NET page parser compiles the ASP.NET page into an assembly DLL or whether it processes the page in a no-compile mode that is introduced with ASP.NET 2.0.

Imagine that you have just created 100 new WSS sites from the Blank Site template. If none of these sites requires a customized version of its home page (default.aspx), would it still make sense to copy the exact same page definition file into the content database 100 times? The answer to this question is obviously no. Fortunately, pages within a WSS site such as default.aspx are based on page templates that live on the file system of the front-end Web server. Page templates are used to provision page instances within the context of a site, such as the page that is accessible through a specific URL like http://litwareinc.com/default.aspx.
When a page instance is initially provisioned from a page template, WSS doesn’t need to store a copy of it in the content database because WSS can load the page template from the file system of the Web server and use it to process any request for an uncustomized page instance.
Therefore, you can say that page ghosting describes the act of processing a request for an uncustomized page instance by using a page template loaded into memory from the file system of the front-end Web server.
Page ghosting is valuable because it eliminates the need to transfer the contents of a page definition file from the SQL Server computer with the content database to the front-end Web server computer. Page ghosting also makes it possible to process the home pages for thousands of different sites by using a single page template that is compiled into an assembly DLL and loaded into memory in the IIS worker process just once per Web application. Both of these optimizations are key factors in the scalability of WSS in high-traffic environments running thousands or tens of thousands of sites.
Customized pages are sometimes referred to as unghosted pages.
SPVirtualPathProvider that determines whether the page being requested has been
customized. The SPVirtualPathProvider makes the decision whether to process a page as a ghosted or an unghosted page.
The new architecture introduced in WSS 3.0, which includes the SPVirtualPathProvider and the ASP.Net page parser, should be seen as one of the more significant architectural enhancements over WSS 2.0.
When WSS converts an IIS Web site into a Web application, it creates several virtual directories. These virtual directories, including the _controltemplates directory, the _layouts directory, the _vti_bin directory, and the _wpresources directory, are used by various aspects of the WSS runtime. The _wpresources virtual directory provides a repository for resource files that are deployed along with Web Parts.
Application pages are served up from the _layouts directory.
Thursday, June 5, 2008
Introduction to Features in Sharepoint-Part2-Chapter1
Features provide a mechanism for defining site elements and adding them
to a target site or site collection through a process known as feature activation. The element types that can be defined by a feature include menu commands, link commands, page templates, page instances, list definitions, list instances, event handlers, and workflows.
At a physical level, a feature consists of a directory created within a special WSS system directory located within the file system of each front-end Web server. The directory for a feature contains one or more XML-based files that contain Collaborative Application Markup Language (CAML). By convention, each feature directory contains a manifest file named feature.xml that defines the high-level attributes of the feature, such as its ID and its userfriendly Title.
Programming Against the WSS Object Model
static void Main() {
string sitePath = "http://litwareinc.com";
// enter object model through site collection.
SPSite siteCollection = new SPSite(sitePath);
// obtain reference to top-level site.
SPWeb site = siteCollection.RootWeb;
// enumerate through lists of site
foreach (SPList list in site.Lists) {
if(!list.Hidden)
Console.WriteLine(list.Title);
}
// clean up by calling Dispose.
site.Dispose();
siteCollection.Dispose();
}
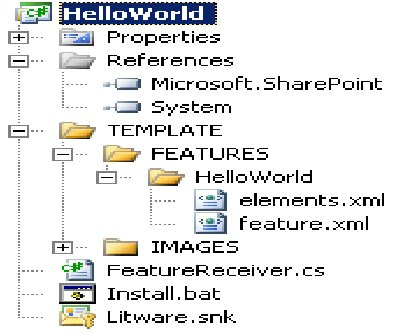
Future.xml
feature id="B2CB42E2-4F0A-4380-AABA-1EF9CD526F20" title="A Sample Feature: Hello World" xmlns="http://schemas.microsoft.com/sharepoint/" description="This demoware was created by NaveedShare-LicenseToPlay " scope="Web" hidden="FALSE" imageurl="TPG\WhitePithHelmet.gif" receiverassembly="HelloWorld, Version=1.0.0.0, Culture=neutral, PublicKeyToken=b38a04419cc857d9" receiverclass="HelloWorld.FeatureReceiver">
elementmanifests>
elementmanifest location="elements.xml">
/elementmanifests>
/feature>
elements.xml
elements xmlns="http://schemas.microsoft.com/sharepoint/">
customaction id="SiteActionsToolbar" title="Hello World" description="A custom menu item added using a feature" imageurl="_layouts/images/crtsite.gif" location="Microsoft.SharePoint.StandardMenu" groupid="SiteActions" sequence="100">
urlaction url="http://msdn.microsoft.com">
/customaction>
/elements>
FeatureReceiver.cs
using System;
using Microsoft.SharePoint;
namespace HelloWorld {
public class FeatureReceiver : SPFeatureReceiver {
// no functionality required for install/uninstall events
public override void FeatureInstalled(SPFeatureReceiverProperties properties) { }
public override void FeatureUninstalling(SPFeatureReceiverProperties properties) { }
public override void FeatureActivated(SPFeatureReceiverProperties properties) {
SPWeb site = (SPWeb)properties.Feature.Parent;
// track original site Title using SPWeb property bag
site.Properties["OriginalTitle"] = site.Title;
site.Properties.Update();
// update site title
site.Title = "Hello World";
site.Update();
}
public override void FeatureDeactivating(SPFeatureReceiverProperties properties) {
// reset site Title back to its original value
SPWeb site = (SPWeb)properties.Feature.Parent;
site.Title = site.Properties["OriginalTitle"];
site.Update();
}
}
}
Install.bat
@SET TEMPLATEDIR="c:\program files\common files\microsoft shared\web server extensions\12\Template"
@SET STSADM="c:\program files\common files\microsoft shared\web server extensions\12\bin\stsadm"
@SET GACUTIL="c:\Program Files\Microsoft Visual Studio 8\SDK\v2.0\Bin\gacutil.exe"
Echo Installing HelloWorld.dll in GAC
%GACUTIL% -if bin\debug\HelloWorld.dll
Echo Copying files to TEMPLATE directory
xcopy /e /y TEMPLATE\* %TEMPLATEDIR%
Echo Installing feature
%STSADM% -o installfeature -filename HelloWorld\feature.xml -force
IISRESET
REM cscript c:\windows\system32\iisapp.vbs /a "SharePointDefaultAppPool" /r
Once you have added the install.bat file, you can configure Visual Studio to run it each time you rebuild the HelloWorld project by going to the Build Events tab within the Project Properties and adding the following post-build event command line instructions.
cd $(ProjectDir)
Install.bat
The properties parameter is based on the SPFeatureReceiverProperties class that exposes a Feature property that, in turn, exposes a Parent property that holds a reference to the current site.
Subscribe to:
Posts (Atom)
